6 - Basic Color Theory
This article was supported by Patreon! If you like what I’m doing here, please consider supporting me there :) Also, this is the part 5 of a series of articles, read the whole series here.
Understanding Colors
Even when using a pre-created palette we still need to think about the colors we are using. My main objective when it comes to colors is to do as much as I can with as little as possible. I’ll try to explain some characteristics and synergies between colors.
We can break colors down to 3 main aspects: hue, saturation, and value, or HSV for short. There are more ways to break down colors, like HSL, RGB, LAB, CMYK and many others, but I chose HSV because it’s a very simple and direct way of manipulating color when drawing. Let’s explore these aspects one by one.
Hue
Hue is a property that describes… well, the color of the color. It’s also called the identity of the color, if it’s red, green, blue, but not how bright or intense it is. It’s important to note that some hues, like blue and purple, can appear darker than yellow, even when the luminosity value is the same. Remember that you might need to compensate this depending on the effect you are going for.
Usually we avoid mixing too many different hues in a single image or it might get too busy. I’ll explain some more about this in the Color Schemes topic.
Saturation
Saturation is the intensity of color or pigment in a color. A bright red has high saturation, opposing a grey color, which has very low saturation. Usually too much saturation can make your eyes hurt a little, so if you’re not sure, avoid using 100% saturation in colors.
Large high saturation areas can also make the eye tired, so again, if you’re not sure, try using large low saturation areas with small high saturation details.
Value
Simply put, value is the amount of light a color has. A light orange has a high value, a dark orange has a low value. Usually this is directly related to light; where there’s light there’s a high value color and the opposite in the shadow.
Color Temperature
Color temperature is not part of the HSV model but it’s a very important characteristic of the color.

Color temperature is dictated by all the characteristics: hue, saturation, and value. In general, you can think something like this:
- Red hues are hot and blue hues are cold
- High saturation is for the extremes (hot or cold) and low saturation are for temperatures in the middle. Pure gray is usually perceived as slightly cold.
- Value is complicated, but most of the time, high values mean hot and low values mean cold.
I like to have images with opposing shadow and light temperatures, usually a hot light and cold shadows, but sometimes the opposite can work too. This doesn’t mean that one needs to be red and the other blue, just slightly warmer or colder, it all depends on the ambiance you want to create.
Shading
Choosing colors is especially important when dealing with light and shadow. I explained the basics of shading in my previous article (that ideally you should read before this one). I’ll focus now on how to choose colors when shading.
Let’s try making a simple drawing of a vase, here’s how I started mine:

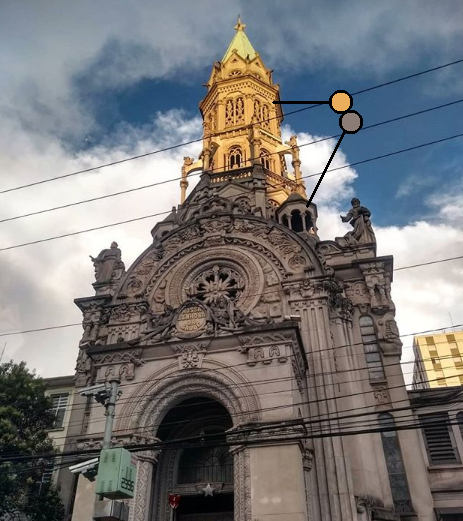
When making the light, one might think “I’ll just increase the value on the bright areas!” but that’s not it works in the real world. Check this picture of a church. You can see that the bright area on the top is clearly more saturated and yellow than the darker area, which almost feels blue in contrast with it (but it’s actually a very low saturated red). Using pictures like this is a great way of understanding color and light.
Let’s try to apply this logic to our little vase. Instead of using a simple value ramp, we will use a hue-shifting and saturation-shifting ramp.
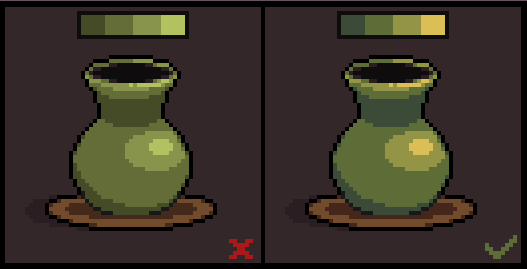
As you can see the simple ramp on the left looks a little dull and muddy, while the one on the right is more vivid and interesting. In this case I made the shadow a little more blue and less saturated (colder), and the light a little more yellow and saturated (warmer), almost like the church photo.
When not sure, always look for photo references and experiment a lot! Sometimes just try something crazy like doing a higher value than the mid-tone or using a completely different hue for the highlights, you might stumble upon an interesting technique.
Color Schemes
You can group colors using some clever formations and use that to create your palettes and composition. This is not something absolutely necessary but it’s definitely a useful tool for creating interesting contrast and moods.
Monochromatic

The simplest color scheme, you can’t go wrong when you only use a single hue. This usually have a very strong and stylized feel to it, so use with caution. Keep in mind that you don’t need to use a single saturation or that you are prohibited to move the hue a little, just avoid major color changes, you can still hue-shift your light.
Complementary Colors
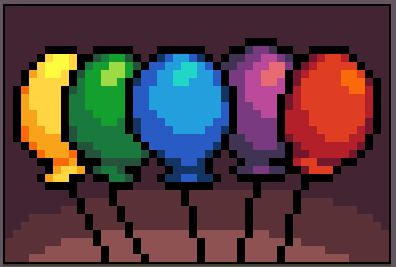
Image for post A red and green complementary scheme This is an amazing scheme, great for creating a strong contrast. Usually one of the colors is the main one, while the complementary color, the one on the other side of the wheel, is used in some details. Red and green, blue and orange, and purple and lime are some other examples.
Careful with this combination, though. It creates some very intense and aggressive images, especially at high saturation levels.
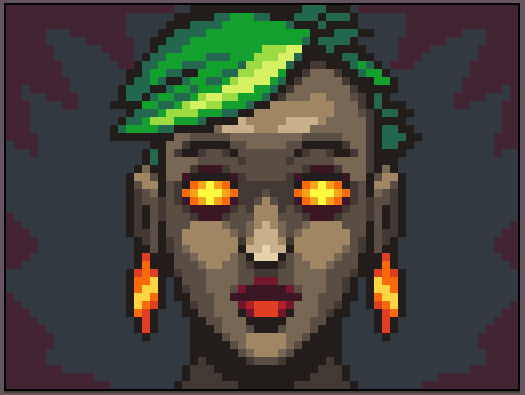
Analogous Colors

Analogous is a scheme made by choosing a main color, green in this example, and two others from nearby hues. This color scheme is usually very calming and comfortable. It’s great for low-contrast and harmonious images.
Now what?
There are a lot of color schemes, like the Triad, Split Complementary, Square, and many other variants. Color theory is a very deep subject, and if you want to learn more you can check other sources:
- On Wikipedia
- Basic Color Theory
- Thread about colors on Pixel Joint
- Understanding Colors on Blender Guru
For making your own palettes, Adobe has this really good tool: https://color.adobe.com/create/color-wheel/ And as a final disclaimer: remember, working with colors is a highly subjective thing. These are not immutable rules, just flexible guides, but I do recommend sticking with them until you feel more confident about what rules to break and how to do that.
Keep reading the part 7 here!